Install AdGuardHome on a Synology NAS with Docker
If you’re looking for a way to block ads, trackers, and malicious sites across all devices on your home network, AdGuard Home is an excellent solution. Unlike browser-based ad blockers, AdGuard Home works at the DNS level, filtering out unwanted content before it even reaches your devices.
AdGuard Home is a self-hosted DNS server that provides network-wide ad and tracker blocking. It functions similarly to services like Pi-hole but comes with an intuitive web interface, built-in parental controls, and extensive customization options.
Key Features:
- Network-wide ad blocking – Blocks ads and trackers on all connected devices.
- Privacy protection – Prevents websites and advertisers from collecting your data.
- Parental controls – Block access to adult content and restrict specific websites.
- Custom filtering rules – Use your own blocklists or subscribe to community-maintained ones.
- DNS-over-HTTPS and DNS-over-TLS support – Encrypt DNS queries for better security.
- Cross-platform support – Works on Linux, Windows, macOS, Raspberry Pi, and Docker.
Unlike browser extensions, which only block ads within a single browser, AdGuard Home filters all network traffic, meaning it works on smart TVs, game consoles, mobile devices, and more. This makes it an ideal solution for households looking to improve privacy and security.
You can find the Official site here.
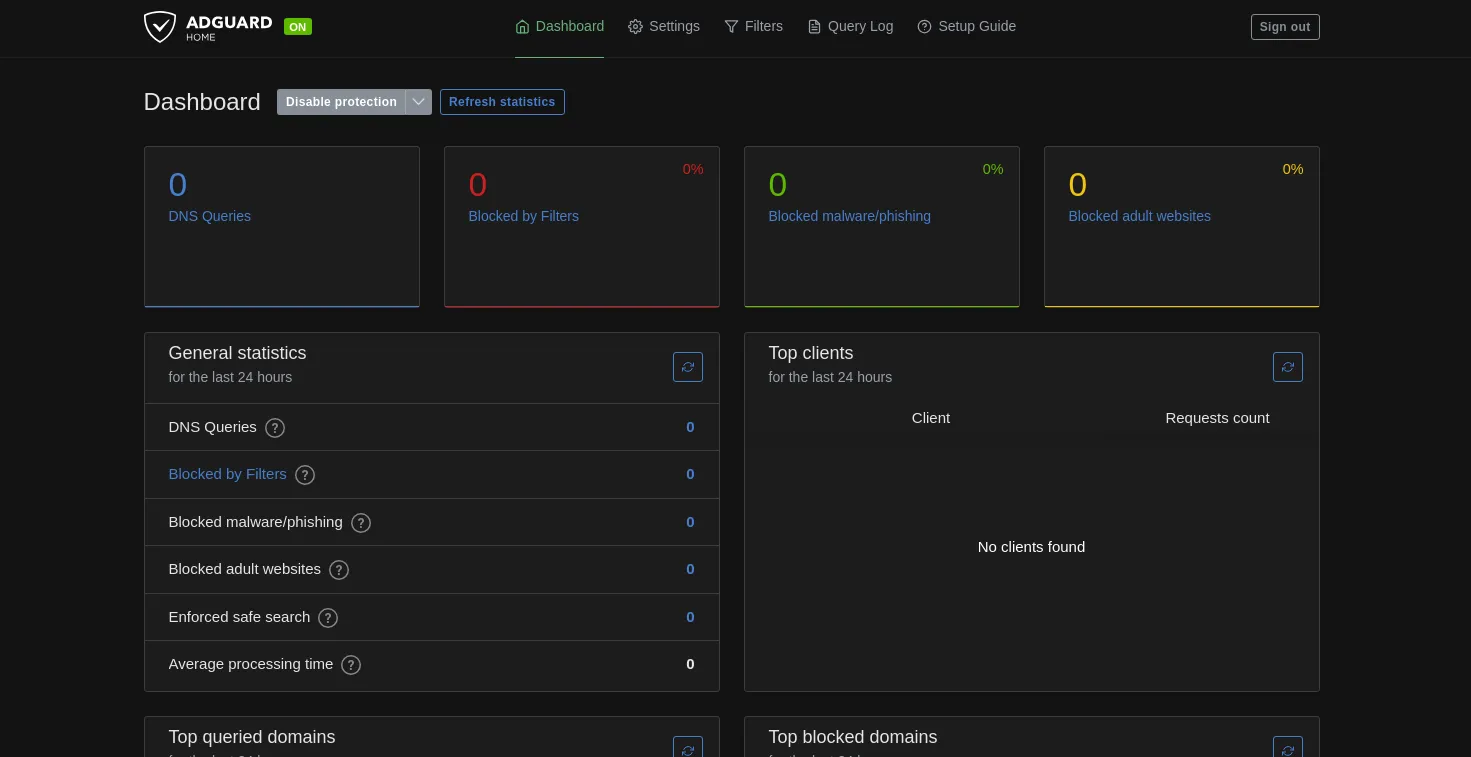
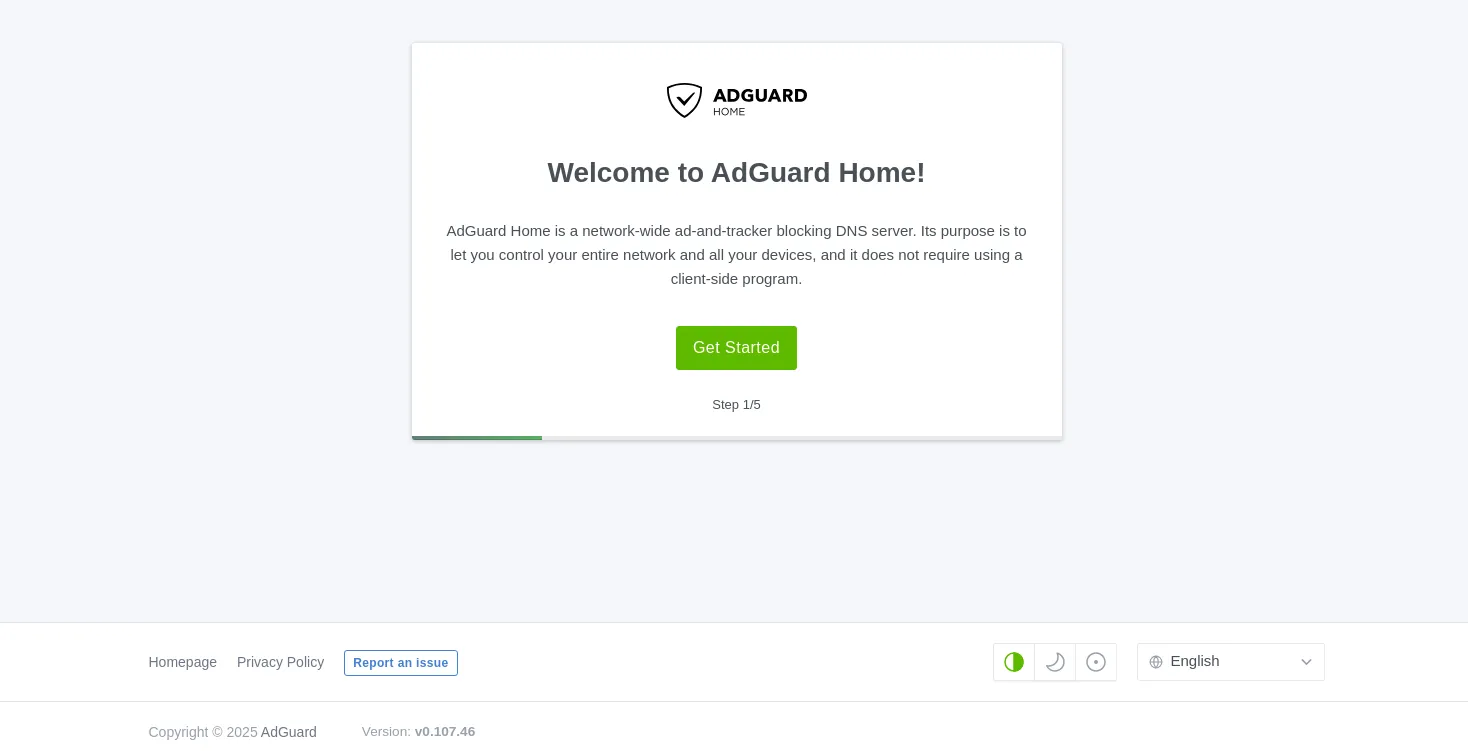
Screenshots/Demo 🖥️
Here are a few screenshots to give you a better sense of how it looks.
View Screenshots
Create Share Folder
-
Log in to your Synology NAS
Access your Synology NAS using your web browser and enter the login credentials. -
Open the Main Menu
In the top-left corner, click on the Main Menu (the icon with squares). -
Navigate to File Station
In the Main Menu, locate and click on File Station to open the file management tool. -
Go to the Docker Folder
In the left sidebar of File Station, find your Docker folder or navigate to the location where you store Docker-related files (you may need to create one if it doesn’t exist). -
Create a New Folder
At the top of File Station, click on Create.
Select Create Folder from the dropdown menu.
Name the folderadguardhome. Press OK to create the folder. Inside the adguardhome folder, Create a folder called config and one called work.
Now, you have a Adguardhome folder in the Docker directory, where you can store configuration files or other relevant data for your setup.
Setting up Task Scheduler
- Log in to your Synology NAS.
- Navigate to the Main Menu and open the Control Panel.
- Scroll down and locate Task Scheduler, then click to open it.
-
In the top menu bar, click Create, select Scheduled Task, and choose User-defined Script.
- In the window that appears:
- Enter a task name. This can be anything, such as the name of the app you’re installing. It doesn’t need to be specific. Adguardhome will be fine.
- For User, select root from the dropdown menu.
- Click on the Schedule tab at the top:
- Select Run on the following date and leave the Start time and Repeat options at their default values.
- Next, click the Task Settings tab:
- Ignore the Notification section.
- Under Run command, paste your
docker runcommand. Double-check to ensure all file paths and parameters are correct.
Docker Run Code
1
2
3
4
5
6
7
8
9
10
docker run -d \
  --name=adguardhome \
  --network=host \
  -v /volume1/docker/adguardhome/config:/opt/adguardhome/conf \
  -v /volume1/docker/adguardhome/work:/opt/adguardhome/work \
  -p 53:53/tcp -p 53:53/udp \
  -p 8083:3000 \
  -p 8084:80 \
  --restart unless-stopped \
  adguard/adguardhome:latest
Please double-check your
paths. You can also change the port number if required. Remember to visit the official guide as there may be extra features you can enable. Official Guide
- Click OK to save the task. You’ll be prompted to enter your Synology NAS password—enter it and press Submit.
- Back in the List of tasks, locate the task you just created.
- Select the task, then click Run from the top menu. When prompted to confirm, click OK.
Your task will now execute, setting up your Docker container. This process may take several minutes. You can now open your container by visiting:
yournasipaddress:3000. Adguardhome should now be up and running!
Docker Compose Code
If you’re comfortable with Docker Compose, you can use the following configuration to set up the installation for Adguardhome.
1
2
3
4
5
6
7
8
9
10
11
12
13
14
15
16
version: '3.8'

services:
  adguardhome:
    container_name: adguardhome
    image: adguard/adguardhome:latest
    network_mode: "host"
    volumes:
      - /volume1/docker/adguardhome/config:/opt/adguardhome/conf
      - /volume1/docker/adguardhome/work:/opt/adguardhome/work
    ports:
      - "53:53/tcp"
      - "53:53/udp"
      - "8083:3000"
      - "8084:80"
    restart: unless-stopped
1
docker-compose up -d
Thanks for reading! 🎉🤘🎶
Did you enjoy the post? Share it with your friends and spread the good vibes! 😎📤🙌
If you enjoy the site, feel free to tip me.